Midjourney's Hidden Features
Unlocking The Power Of Productivity In Midjourney
The following are Midjourney features that I use all the time to boost my productivity.
And I refer to them as “hidden” because they are not frequently mentioned as much as other more noticeable ones. I hope they will be helpful to you as well.
Using Placeholders
When using Midjourney, you may find yourself trying to remember the prompts you’ve used in the past.
However, You can store your prompts (parameters) directly in Midjourney, and simply reference them using a single word.
This word can serve as a placeholder when you want to reference a string of words. For example… supposing you want to use these parameters to generate ultra-realistic photos:
clear facial features, 35mm lens, f/1.8, natural lighting, global illumination — uplight — q 2
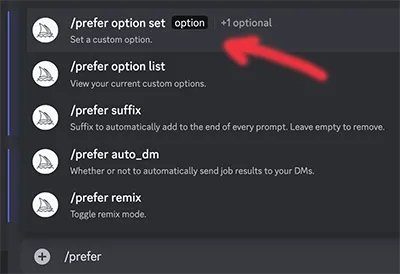
In Midjourney, type /prefer and select /prefer option set
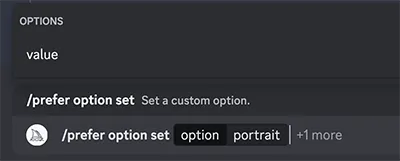
The next step, name it… in this example, I named it ‘portrait’
Then click on the +1 more and select ‘value.’
paste your parameters in the value field:
(note I added a comma at the beginning of the value so that it separates it from the subject info)
I have now added a new placeholder word called “portrait” which contains the string of parameters. So whenever I want to generate ultra-realistic portraits, I can now just add the word “–– portrait” to my prompt.
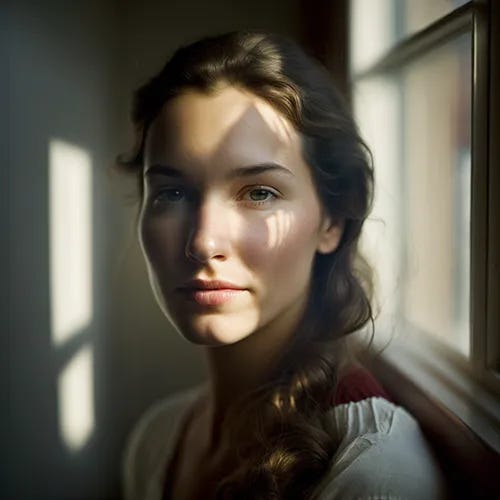
So this…
Becomes this…
Multiple Variations Using Only One Prompt
In Midjourney, you can prompt multiple variations using a single prompt with the use of curly brackets. This is referred to in Midjourney as Permutations.
An example might be that you are not sure what style you would like to use, so you can put the styles within curly brackets like this:
{photo, illustration, sketch} of a rabbit riding a motorcycle
And that single prompt will then initiate this…
photo of a rabbit riding a motorcycle — v 5.1
illustration of a rabbit riding a motorcycle — v 5.1
sketch of a rabbit riding a motorcycle — v 5.1
Using Permutations is a great way to experiment with different parameter settings.
to generate versions with different aspect ratios:
photo of a dog { ––ar 1:1, –– ar 2:1, –– ar 16:9}
to generate versions with different quality settings:
photo of a dog { ––q .25, –– q .5, –– q 1}
to generate versions with different stylize settings:
photo of a dog {––s 0,––s 50, ––s 100, –– s 250, ––s 750, ––s 1000}
The Power Of The Seed
In Midjourney, images are associated with a distinct seed number. This seed number serves as a unique identifier, which is utilized as a basis for generating the initial image grids.
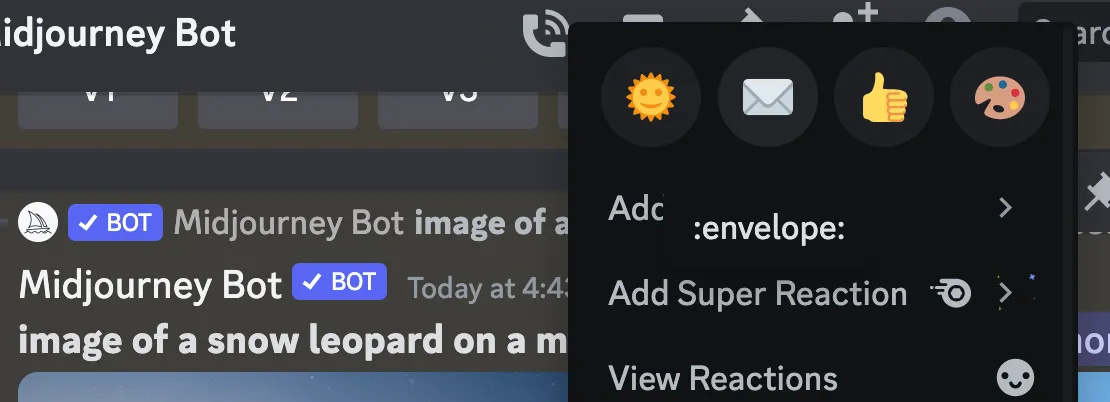
To find the seed number, simply react to an image and select the envelope icon. I usually just control-click to open the dialog box.
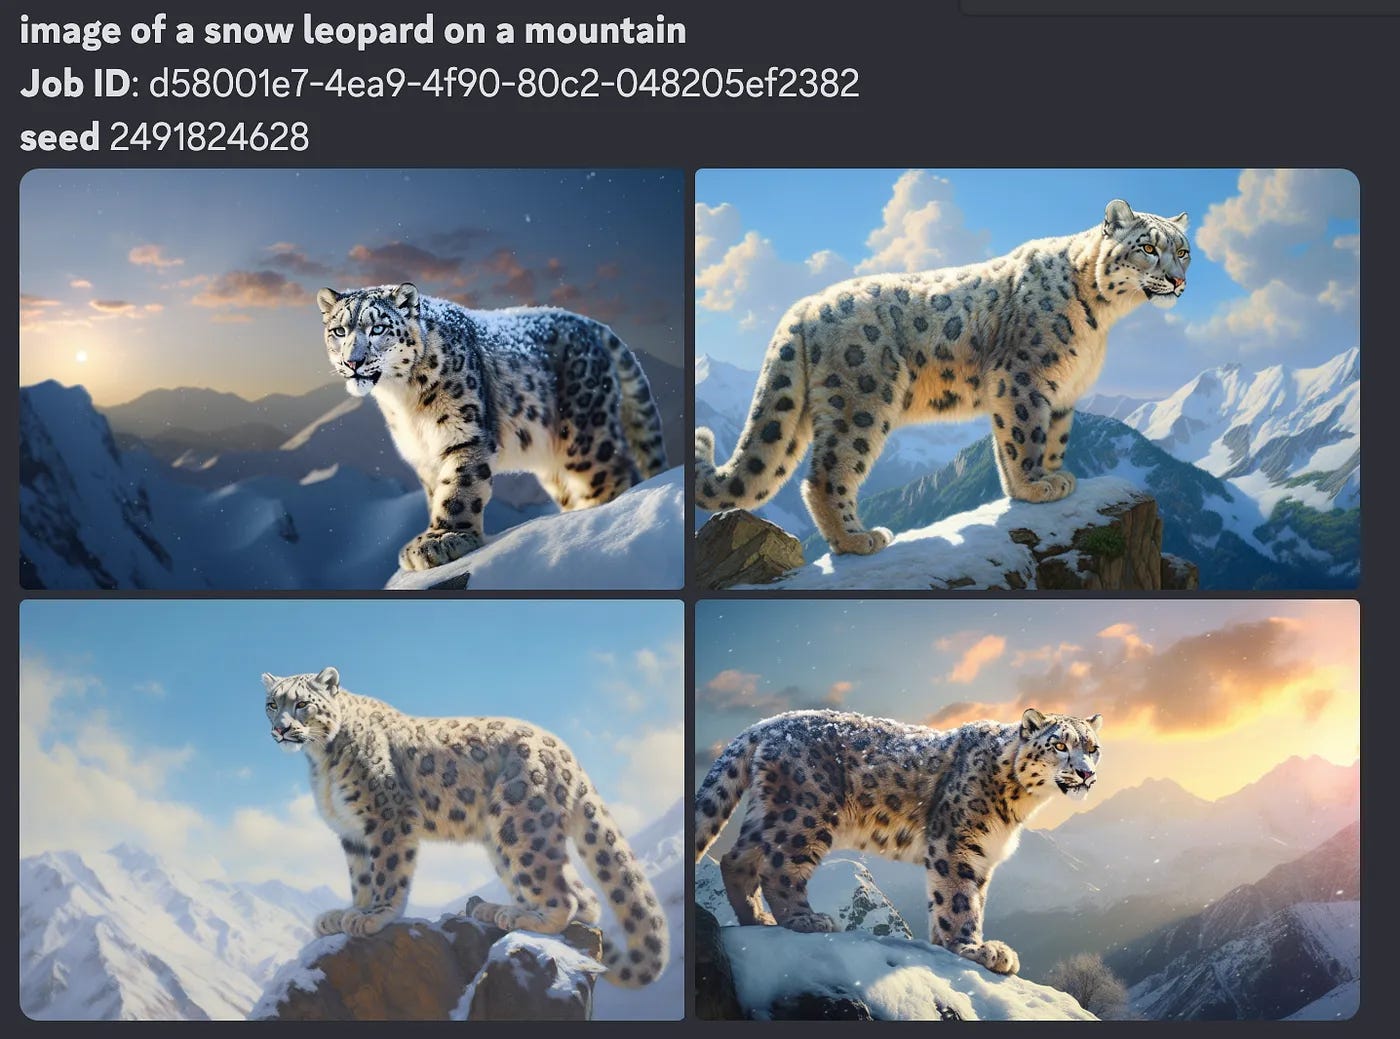
That will return the Job ID and Seed number.
So if you were to add the same exact prompt along with the seed number, you would get the same exact images you see here.
image of a snow leopard on a mountain ––ar 16:9 ––seed 2491824628
Why is this important? why does it matter?
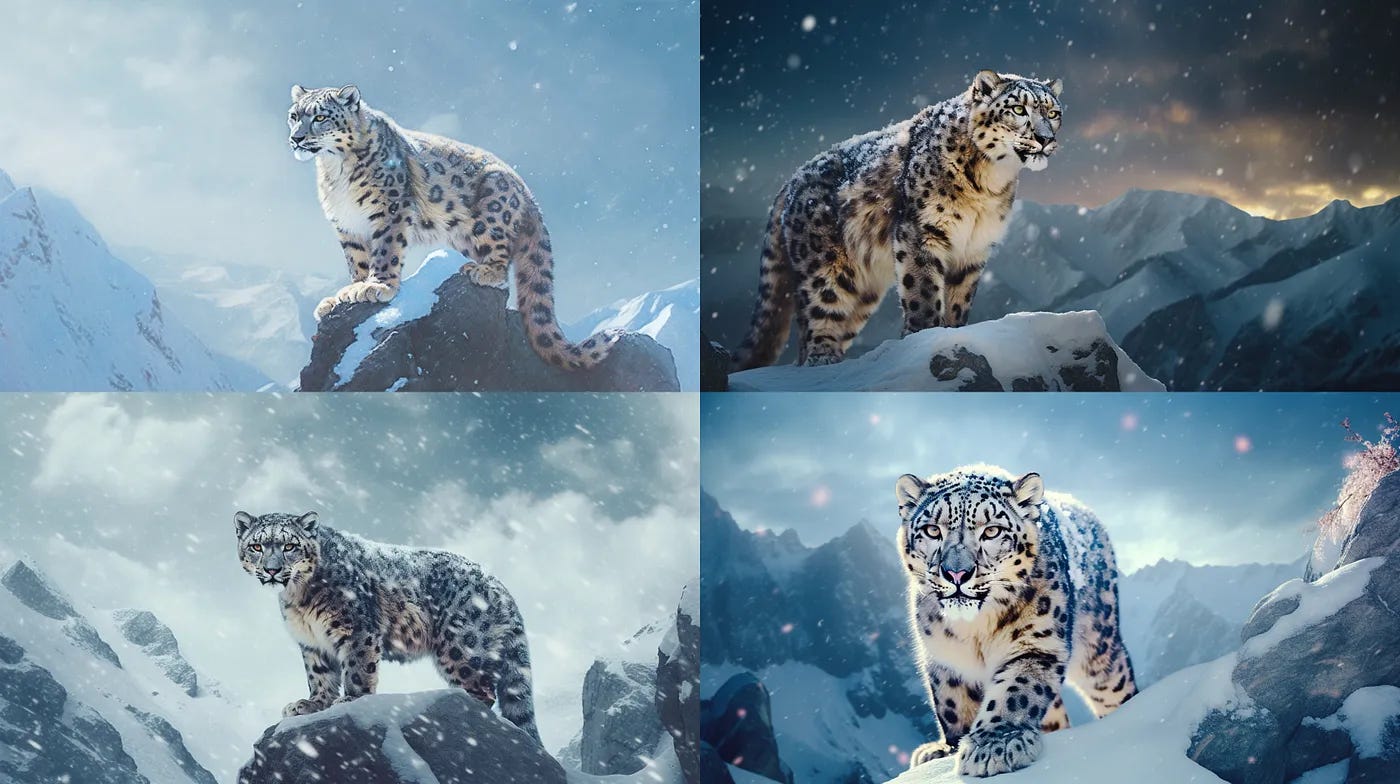
because by using the same seed number, you can make detailed changes in your prompts that will produce similar images.
image of a snow leopard on a mountain while snowing — ar 16:9 — seed 2491824628
The benefits of using Seed numbers are as follows…
To create consistent characters and similar scene output. Using the seed number in the prompt will get you close.
Like using the Remix mode, using the seed number can be used to make detailed changes. It will sometimes produce better results than Remix.
If you want to use an image you really like as a starting point for creating variations, using the seed number could serve as that source indicator.
Search And Return
Suppose you wanted to locate an image you created earlier, either to modify it or create variations, what steps would you take?
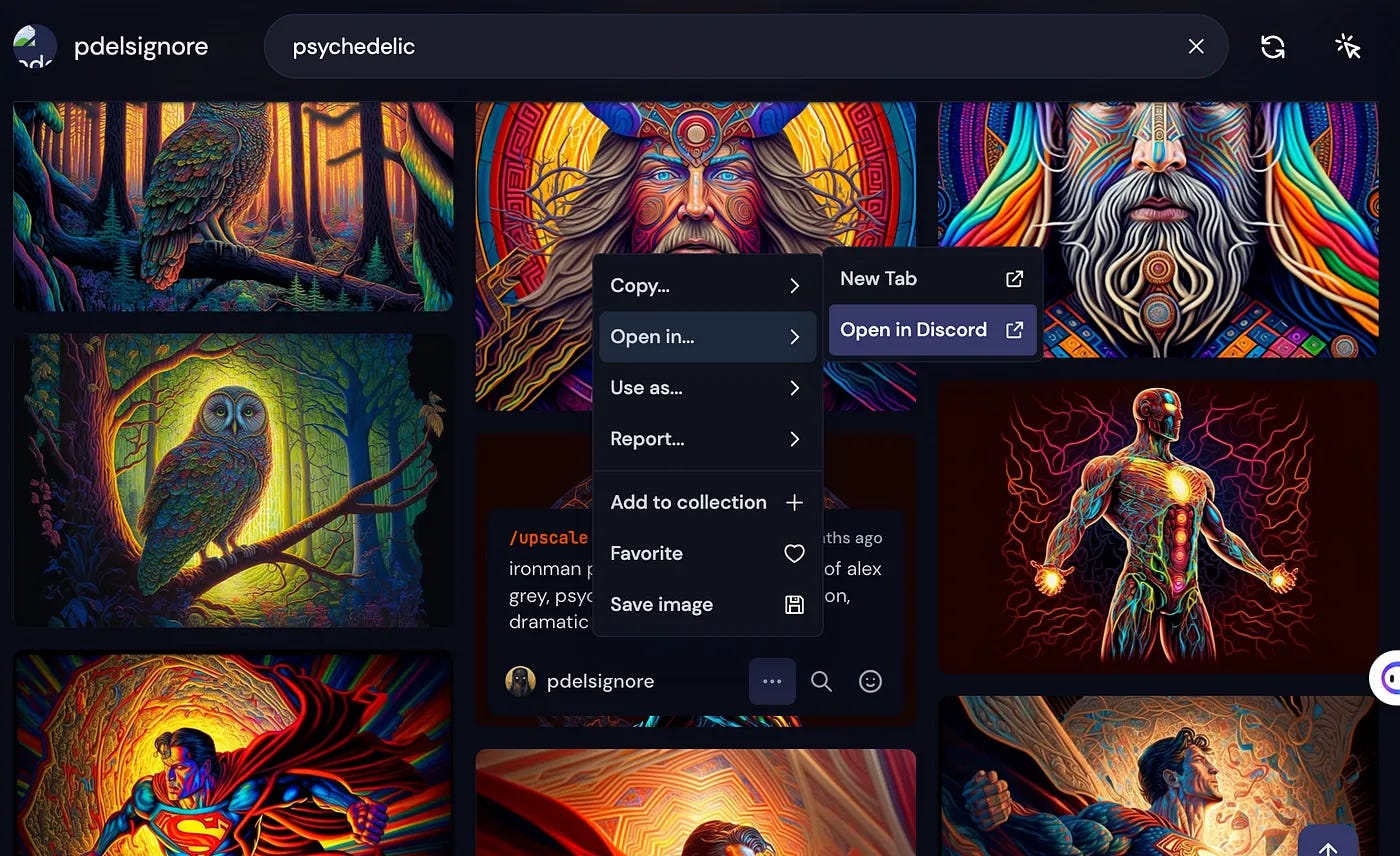
By logging into your account on the primary Midjourney website, you can search for a previous image using a keyword search feature.
Just type in a word or phrase to return the results.
Then hover over any specific image, and click on the 3 dots to open a nav selection. Simply click on the ‘Open in Discord’ option to take you back to the original location of your image.
Explore Related Images
Sometimes when you are trying to generate a specific image you have in mind, you may need a little bit of prompt inspiration to get you there.
Maybe you generated an image that is close, but not exactly the output you wanted.
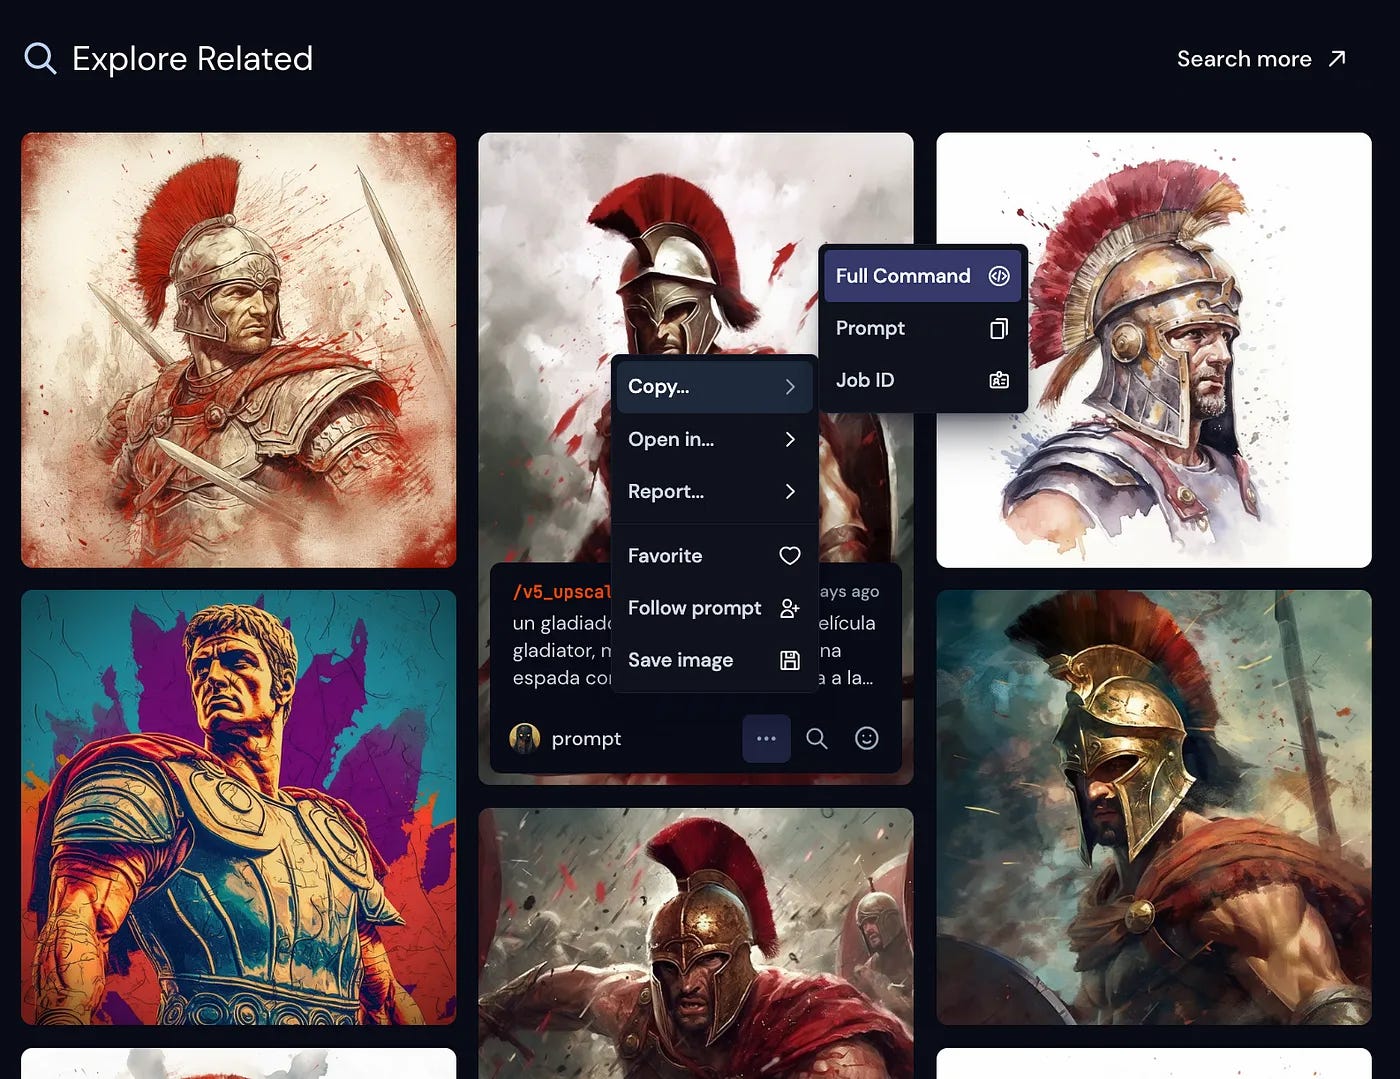
Simply click on your generated image from the Midjourney website and below your image you will see an ‘Explore Related’ section. This shows you public images generated from the Midjourney community.
If you like an image that is closer to what you are imagining, you can copy the ‘full command’ of the image prompt and compare it against your prompt. Full command includes parameters in the prompt which is important for accuracy.
Exploring prompts in this way is also a great way to improve your prompt engineering skills.
Keeping Images Private
If you want to keep your images private, so they aren’t available in Midjourney’s public results or anywhere else, there are 2 options.
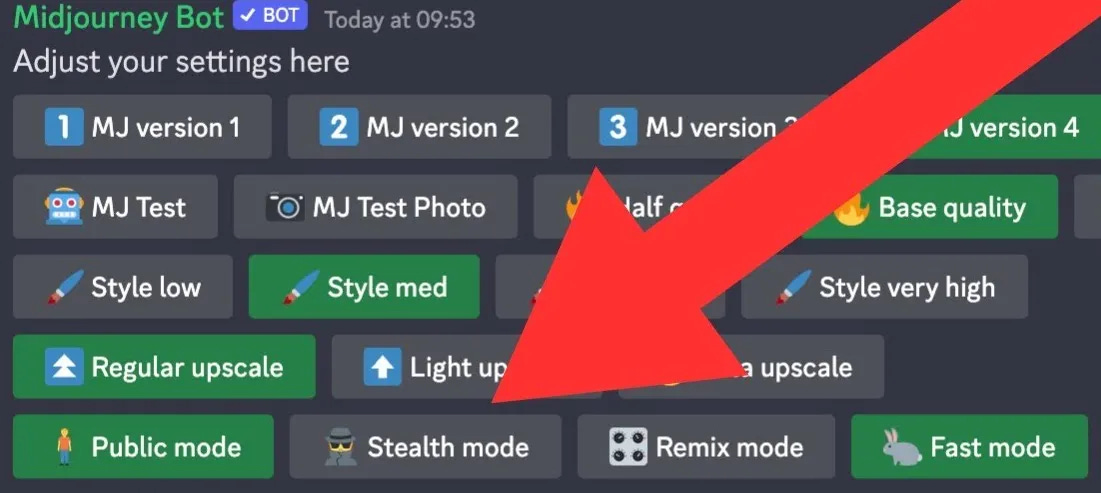
Option 1: Stealth Mode
You would need to subscribe to the pro plan which includes Stealth mode.
You can then enable Private/Stealth Mode, by typing “/private” or by switching to ‘Stealth mode’ in settings.
Important: To prevent others from seeing an image you create using Stealth Mode, generate images in your Direct Messages or on a private Discord server.
Option 2: Save and Delete Your Image
If you don’t want to pay for the Pro Plan, You could download your image and simply delete it from Discord.
You can do so by reacting to the message in Discord with the ❌ symbol. This will remove it entirely and not show up on the Midjourney Explore or community website.
A disadvantage in deleting rather than using stealth mode is you would not be able to search or find your image in Midjourney’s history index if you wanted to create variations.
Final Thoughts
I hope these tips were helpful in enhancing your Midjourney production process. Let me know if there are any tips you use in the comments section.


